Hammer Time! Please touch this!
Yesterday your students drilled holes in chestnuts. Why not introduce them to hammer skills next?
As with introducing hand drilling, when we introduce hammer skills, we work with one child at a time.
We have a play-based program so while one child is learning tool skills, the other students are playing in the mud kitchen, swinging with the tree swing, experimenting at the water table, creating worlds in the sand box or dressing up with costumes. We provide many interesting experiences for the children to investigate in our outdoor learning environment.
Although there is so much to do outdoors, a group of children will inevitably congregate to see what hammering is all about. They love learning to use tools. It makes them feel very grown-up, proud and self-sufficient.
A hammer skills progression for young children might look like this:
- First have the students hammer golf tees into sand to learn the safety rules.
- Next, supervise them as they hammer nails into log stumps.
- Then, support your students to make wood crafts of their choice. We get scraps of wood from any generous donor or our Senior School Design Technology department. Our preschool students have made robots, cars, airplanes, birds, dolls and spaceships, for example.
Learning Hammer Safety

You need golf tees, small bucket of sand and child-sized hammer.
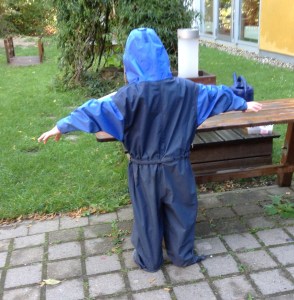
We teach the children to do a “safety check” by stretching out their arms. There should be no one standing within their arm’s reach. If someone is standing too close, they should say, “Please move away.” This is called their “safety bubble”.

Child doing the “safety check”.
When everyone is far enough away, the student picks up the hammer and hammers as many golf tees as they like in the bucket of sand. When they are finished hammering, they remove all their golf tees from the sand. They put down the hammer and leave the table.
Once they have walked away, the next child can approach the table and do their safety check.

Before hammering with real nails, we learn how to use a hammer safely.
The tools we give the children are child-sized. The children can use them with success because the tools fit their hands properly. It’s very important to note that we use real tools made of metal – not plastic toys.
Why not head outside today to teach your students hammer skills?


